Here are detailed step by step instructions for a beginner to do a first DIY stick and poke tattoo safely.
This article contains links to other posts on our blog. Click on the links for more detailed explanations of each step. Also see our 5-step article.
Obtain Supplies And Prepare Your Body
Gather your stick and poke tattoo, or “hand poke” supplies. Tattoos needles and ink are obvious. You’ll need several medical supplies to safely handle the minor injury inherent in all tattooing. Finally, you will need after care supplies that are specific to the tattoo industry. Here is a detailed list of what is in our beginner kits that you can use as a shopping list. Many of these supplies must be purchased individually online, as they are not available in any store, and no tattoo shop will hand these over to you.
NOTE: It is very important that you get high quality stuff. Many tattoo materials, including tattoo inks, are not regulated by the FDA, so there are a lot of cheap and dirty products out there. Therefore, it is good to know what ink brands are the best.
To prepare for your tattoo, plan to drink lots of fluids and abstain from alcohol and drug use – as that dehydrates your bo dy and may affect your tattoo. Be healthy and sober on the day of your tattoo. Your skin is an organ that you will be literally poking ink into! Your lymph nodes, a major part of your immune system will be working overtime in reaction to the ink you are injecting into your skin. Keep in mind that your skin will behave differently based on your overall health and the tattoo location. Get yourself ready mentally and physically.
Consider your design. Sketch it a few times and consider which is best for you. Look at thousands of tattoos by other beginners here. Sleep on it. This is a permanent feature of your body (unless it fades away on your fingers or toes, or you get it removed). Once you’ve decided what you want, make notes on your original drawing to remind yourself what you want where (thicker line, color, shading).
If you tend to have allergies to things, test an area of your skin by poking in some ink to see if you have a reaction.
Set up Tattoo Area
1. Create a clean work space free of bacterial and germs. Thoroughly wash hands and area to be tattooed with warm soapy water.
2. Shave the area if it’s hairy.
3. Lay out tattoo supplies. Open the needle packages and unscrew ink.
4. Put on medical gloves (these protect the wearer mostly).
5. Use green soap to wash the area. Then, using an alcohol pad, clean the area to be tattooed by rubbing alcohol pad in circles, firmly.
6. Apply the stencil on the skin using stencil transfer gel according to these instructions.
7. Allow the stencil to dry for 10 minutes. If your stencil is put on in the wrong place, quickly wipe it away and apply the same stencil again.
You can reuse the same stencil paper several times.
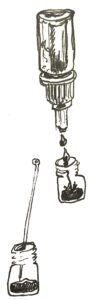
8. Pour desired ink into sterile container, like a mini glass jar or cap. You can mix ink colors, dilute inks for a lighter effect and so on. Read more about that here.
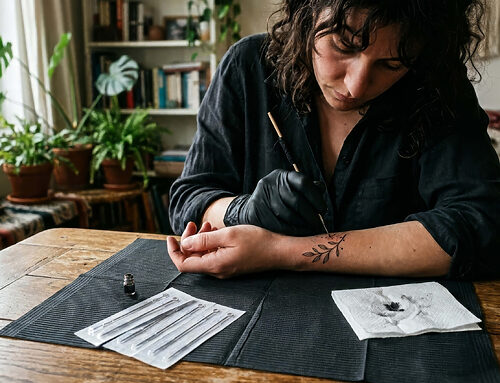
Begin Tattooing
Experience is key as you get into it the hand-poking process. Even so, we have seen many examples of beginner’s luck. Beautiful lines come to those who have natural artistic ability and skin that gracefully holds onto the ink. For those who are interested in specifics, read on for more tips. Our blog is quite helpful as well.
Place your original sketch alongside your tattooed stencil as a way to ensure you are correctly making the line. Things can get messy while you are tattooing, and so any notes about special effects (like needle size changes or change in color) on your drawing will help you stay clear on what you had planned to do.
9. Dip the desired sized needle into the ink jar deep enough so that the ink gets on the needle above the cluster of needle tips. This will leave an ink reserve and to allow for less frequent need to dip.
10. Slowly and gently press the needle into the skin so that the ink is deposited within the skin’s layers. You are not trying to go through the skin, but within the skin. Start out lightly and see how much ink stays in the skin after you wipe. There should be a slight tug as you withdraw. There should not be much blood, although the skin will ooze a clear plasma from the minor injury.
11. Repeat steps 9. and 10. as you poke along the stenciled line. It’s OK to take a break. Exposed ink on the needle or in the jar in the may dry out and you may add distilled water to re-hydrate.
As You Stick And Poke
The area and stencil line will become naturally obscured with ink and plasma mixture. Wipe this away using a sanitary or sterile cloth and special soap. NOTE: Professional artists use blue mechanic shop towels, but we recommend a sterile multi-fiber cloth – for maximum absorption and cleanliness. You can also use witch hazel as an astringent and skin cooler to wipe and clean the area as you go. Many people use tattoo Green Soap and alcohol along with wipes (included in the kit). The stencil should remain if it is a quality stencil that is applied well.
PRO TIP: After each wipe, put a thin layer of aftercare balm over the tattoo to keep the area clear for longer. It contains the mess for a few pokes longer. We sell a vegan vegetable based one that is the very best in the industry.
Check that your depth of poking is correct. The skin will weep, but should not bleed more that a few drops of blood in total. Most do not bleed at all. The stick n poke, (or “hand poke”) method is easier on the skin than a tattoo machine – that stabs into your skin several times per second and tends to tear up the skin – however it is possible to overdo it by hand as well. Therefore, avoid going over the same small area too many times with a several pointed needle (like a 5MS or 5RL and up).
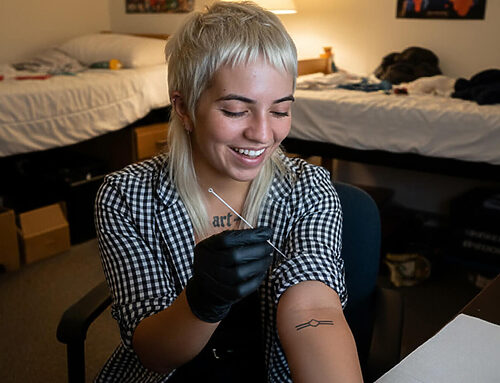
12. Complete your desired tattoo as pain and skin inflammation allows. You can always allow it to heal and revisit the tattoo to fill in gaps and adjust. It is common for ink to “fall out” unexpectedly and a later touch-up session is often necessary.
WARNING: If the skin becomes very puffy, hot or changes color, you may be having a bad reaction. Stop and consult your doctor immediately.
13. Clean up is crucial. Human blood on a needle can be very dangerous. Please oh please put your needle in a plastic bottle and screw on the top for travel to a needle disposal site. Alternatively, you can purchase one of our needle disposal containers. Make sure to put all materials, wipes, ink jar, gloves, etc. into one seal-able bag (or box) and label this as “HAZARDOUS WASTE.” Wipe the work area with a bleach-water solution and thoroughly wash your hands. Let’s keep everyone safe. Blood borne pathogens like HIV and Hepatitis C are real killers that can spread with an unintended needle poke.
After You Tattoo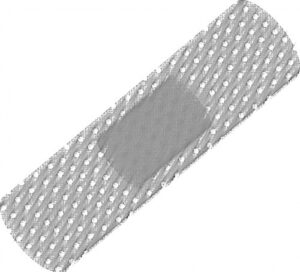
“Aftercare” is very important for any tattoo to heal and look nice. Think of your skin as a frame for your work of art – it must heal nicely in order to display your new art work clearly. The next 2 days is a battle against bacteria and if you follow these steps and are a healthy adult human, you will very likely win.*
14. Finally wipe the tattooed area with green soap or wash with soapy warm water. Next, wipe with an alcohol pad (that will sting), allow to dry and then apply a soaker pad.
15. Five hours later, remove the soaker pad and wash the tattoo area with unscented liquid soap and hot water.
16. Gently pat dry with a clean towel or paper towel. Apply aftercare balm. Repeat cleaning and aftercare regiment until healed. Dense or large tattoos will take longer to heal.
Until healed: Wear loose clothing, or keep on a breathable band-aid. Follow our Aftercare Guidelines fully explained here. Generally speaking, you’ll want to keep it out of the sun, out of bodies of water (no swimming or bathing) and clean and dry. Keep applying the aftercare balm in between cleanings and after drying. ;-)
*WARNING: If you notice the area becoming getting hot, swollen, turning red or another color, bleeding or weeping puss, call your physician immediately.
After You Heal
Put sunscreen on it anytime you’re in the sun. Enjoy your DIY body art!
Post a pic to our Photo Gallery and join the tens of thousands of people in our community of home pokers. (Or tag us on your pic on Instagram and we will re-post for ya).
POKE SAFELY!
Instructional videos have been posted to our YouTube Channel Follow us to be the first to watch.