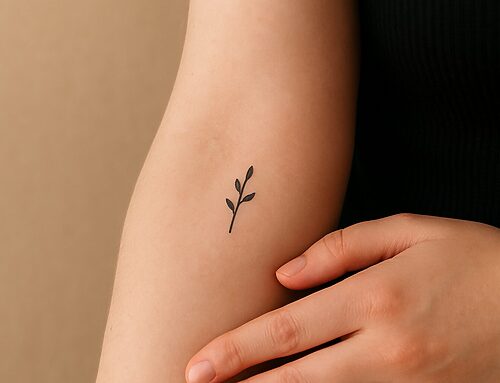
Want a clear and clean tattoo? Stencil it.
Now in every kit:
- 1 small packet of Stencil Transfer Gel *
- One 5.5 x 4 inch piece of Free-draw (not-thermal) Stencil Transfer Paper *
*These products are made for Professional Tattoo Artists & they are Vegan friendly, non-toxic & made in the USA!
We provide a rare stencil paper that shows up on all skin tones (most have purple tones and don’t show up on richer tones). More on tattooing dark tones here.
Learn about or order a Tattoo Kit here
We are glad to FINALLY help all those people out there who can’t free hand poke a tattoo very nicely (I am one). Now, you (and I) can use this stencil to get an accurate line.
Here is how to use this stuff:
- Remove the white or off-white paper that is between the inky paper and top white paper.
- Draw on the top white sheet so that the ink paper transfers the art to top white paper.
- Detach the paper with the artwork and cut around it using scissors.
- Put on gloves and prepare the soap and water cleaned skin area by rubbing it with the alcohol pad provided in the kit.
- Dab a dime sized drop of transfer gel & wipe on THIN and EVEN layer onto the region – making sure to cover the tattoo area and a few inches beyond. It should not be a wet surface – just damp. You might have to wipe it with a dry hand or dab with a paper towel
- Carefully place the paper on the skin (inked side down on skin) of the area. Hold in place and still for 20 seconds.
- Peel it off and let the skin dry for at least 5 minutes. The stencil should last several wipes. To remove, use soap and water. Wrong placement? You can reuse the stencil paper a few times before the ink runs out.
NOTE: If you are using white ink, you will want to wipe the stencil off until it is nearly gone. This is because the stencil ink will get poked into the skin and color it a little bit along with the white.