At home hand poke tattooing is at once really easy AND really hard. It’s both very safe AND can be dangerous! The Complexity! No wonder people want to know how to stick and poke tattoo.
Stick & Poke Tattoo Kit® provides the most detailed, up to date information on how to tattoo in a little 42 page booklet – that has been updated yearly since 2015! We also have a bunch of helpful videos. Our photo gallery and Instagram feed (below) showcase the wide variety of art that can be accomplished with needle and ink in 30-60 minutes.
40,000ish successful tattoos have been created with our kits!
Sometimes you just need to read the whole process in a few steps, so here are the basic instructions on how to give yourself a stick and poke tattoo at home.
HOW TO STICK AND POKE TATTOO in FIVE STEPS
Step 1. Create the body-art environment.
In a clean, dry & safe place, arrange your goods. You will need:
- needles (more than one if your tattoo is complex or larger than a quarter)
- inks ( so much to say here),
- wipes, coverings, gloves, gels, soaps, aftercare balm
- Check out the complete list here
This includes unwrapping and laying out all the supplies and mixing inks that you may want to use. Our kits include everything you need. If you plan to use a stencil, that should also be prepared in advance. Decide where you’d like your tattoo. Some areas are more painful & mucus membranes are more prone to infection.
Step 2. Prepare the skin and consider safety
Shave if hair will get in the way. Clean your hands with soap and water, and clean the greater area with soap and then “green soap.” Finally, wipe with an alcohol pad. IMPORTANT: Consider people around you and how Blood Borne Pathogens are spread. HIV and Hepatitis C can be spread through dried blood! Therefore, you will want to contain your fluids and plan disposal of the soiled items.
Step 3. Transfer the design to skin
You may draw it, transfer it or free-hand it! I’ve been successful with all. Also consider your design and if it is really *yours* to have. It is a sacred symbol belonging to a different culture?
Our kits include the world’s best tattoo stencil gel and transfer paper. It’s also special because it can be used on all skin tones. Read more and watch a how to stencil video here.
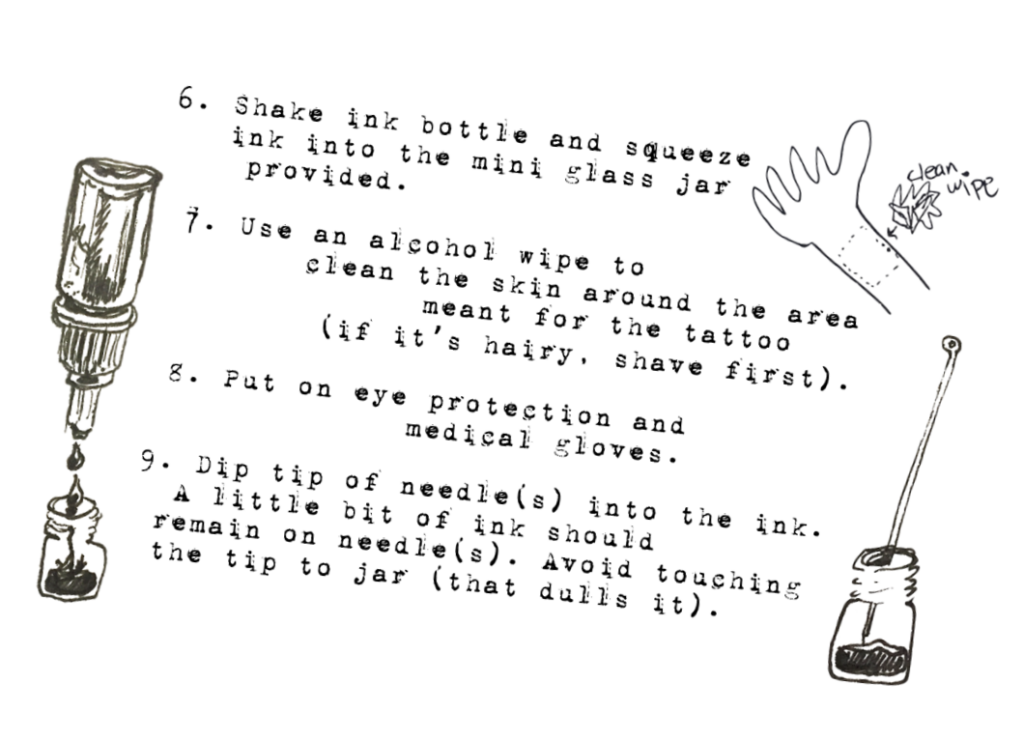
Step 4. Dip the needle and begin
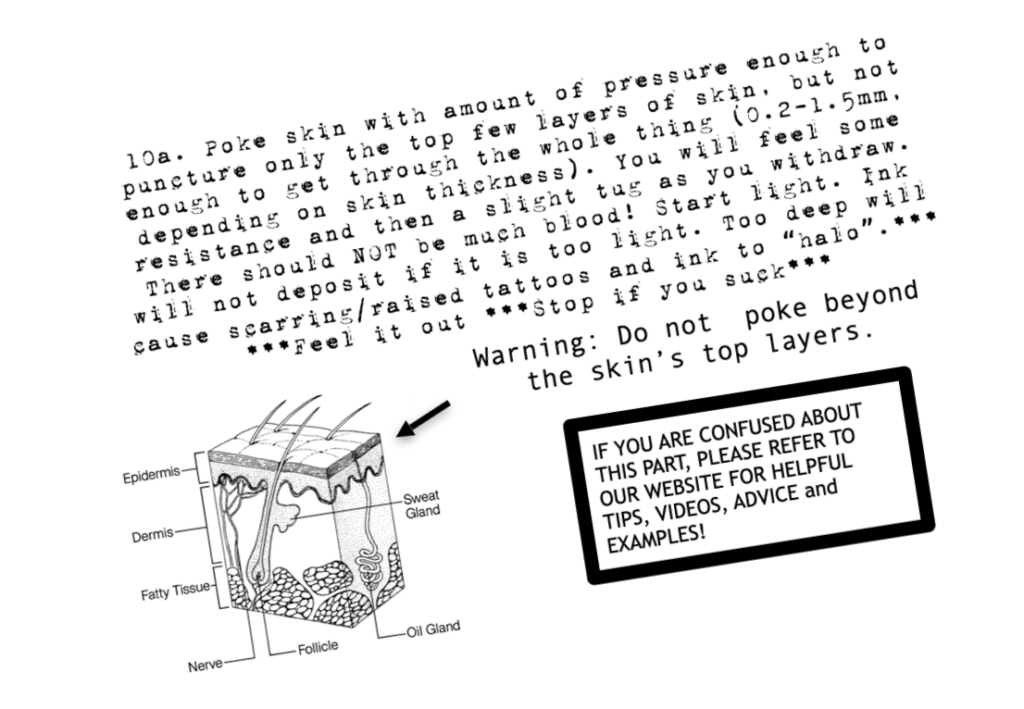
This is where the magic happens. Consider your needle size, angle of poking, depth of poking and stretching the skin as you poke. These factors play into creating a clean tattoo. Dunk it again and poke some more until you see a line or shaded area forming.
HOT TIP: Use aftercare balm to minimize the ink spreading everywhere between pokes. Every few pokes you will have to wipe. Use a green soap solution and soft sanitary fiber wipe (like in our basic kit).
NOTE: Needles do dull. Switch to a new one after awhile. You cannot re-use modern tattoo needles after one session! Please dispose of these mindfully.

Step 5. Aftercare for your tattoo
You have caused trauma to your skin. Your macrophages will begin to gulp up the ink in your top layers and display ink like a glass frame displays a picture. Some ink will be sent to your lymph nodes to be cleaned out of your system. Bacteria from your environment is taking notice too. A new tattoo is a surface skin wound, much like a skinned knee.
To avoid infection and to keep the tattoo looking good (infection also ruins a tattoo), you will want to wipe clean one last time with green soap and isopropyl alcohol. Then use the soaker pad in your kit and cover the tattoo. You don’t want to suffocate the area. Clean air flow is great! You will wash your tattoo in the shower (with liquid soap), then dab with a clean towel (paper towel ideal) and protect from dirt and chaffing until healed (1-2 weeks depending on density). After the first day, begin to apply tattoo aftercare balm. This moisturizes the skin and allows for quick healing.
If your skin becomes really puffy, red or hot, that means infection is taking hold or some other problem. Contact your doctor ASAP.
The Sun fades tattoos, so be sure to apply SPF 35+ when the tattoo may be exposed for more than 20 minutes.
That’s pretty much it! Tattoo removal is painful and costly, but the good news is that hand poke tattoos tend to be easy to remove – especially black.
Poke Safely!


